Installing underfloor heating can be a daunting task, but with the right instructions, it's a job anyone can do. In this blog post, we'll give you all the information you need to install underfloor heating yourself. We'll walk you through every step of the process and tell you what supplies you'll need to get the job done. So whether you're a first-time installer or an experienced DIYer, this blog is for you!
There are two types of underfloor heating you can choose from; electric underfloor heating or water-based underfloor heating. Within these types, you can also install the heating in various ways. We're happy to explain how each method works. Read on!
Installing electric underfloor heating yourself
Electric underfloor heating can be installed in various ways. You can use electric underfloor heating mats, electric heating cables for wet construction/new construction, and electric heating cables for dry construction. We've outlined the three types below.
Electric underfloor heating mats
If you've chosen electric underfloor heating, underfloor heating mats are one way to install it. They're relatively easy to install yourself. They're specially designed to install underfloor heating over an existing tiled floor or a finished floor. With the right tools and patience, anyone can install underfloor heating this way. We'll explain how to install electric mats yourself.

- Plan the space. Make sure you have the right size for the area you want to heat. Also, ensure that the floor area to be heated has sufficient amperage capacity (AMP). Easily order the correct size and number of mats for your area online. To calculate the number of mats you need, measure the space in question from wall to wall. Subtract 20 centimeters from the length and width. Order the number of mats for the total surface area of your room. A tool is included with the product that calculates how many mats you need for your situation.
- Determine the location of the thermostat. A slot needs to be cut into the wall for the electrical conduit and floor sensor tube, and a groove needs to be made in the floor. Create a layout plan. This is a drawing of the room so you know where and how the mats are placed. This also allows you to double-check that you have the correct number of mats in mind.
- Ensure the surface is flat, clean, and free of dust and grease. Lay the mats on the desired surface. Roll out the mat with the heating cable facing up. Keep a distance of approximately 15 cm from the wall. If the mat is not the right length, it can be folded over at 180°C, for example, by cutting the glass mesh without damaging the heating cable. Caution: Never cut the heating cable, and the cables must never touch or cross each other.
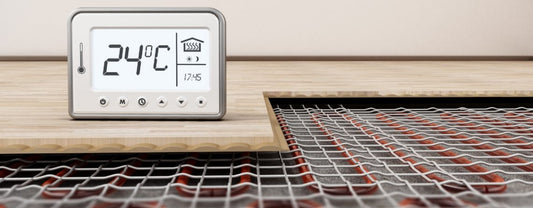
- Connect the thermostat according to the thermostat instructions.
- Test the underfloor heating.
- You can then cover the mats with self-leveling mortar and a screed. Electric mats can be installed over most types of flooring, such as tile, wood, vinyl, and laminate. However, check the manufacturer's specifications first to ensure they are suitable for underfloor heating.
Below is a video that clearly shows how the mats should be laid.
Here you'll find everything you need to install electric mats . Always read the manufacturer's installation instructions carefully before installing the mats to avoid mistakes. Do you have any questions about installing these electric mats? Contact one of our specialists, and we'll be happy to help.
- Here too, it's important to consider the space you're using. Make sure you know which and how many meters of cable you need for the room you want to heat. Also, ensure that the floor area to be heated also has sufficient current capacity (AMP). Easily order the correct size and number of mats for your area online. A tool is included with the product that calculates how many meters of cable you need for your situation.
- Determine the location of the thermostat. A slot needs to be cut in the wall for the two electrical conduits, the power cable, and the floor sensor tube, as well as a groove in the floor. Create a layout plan. This is a drawing of the room so you know where and how the mats are placed. This also allows you to double-check that you have the correct number of mats in mind.
- Make sure the subfloor is level, clean, and free of dust and grease. Insulate the subfloor. Don't forget to install edge insulation to compensate for the floor's expansion and contraction. This prevents a thermal bridge.
- Calculate the spacing between cables. This can be calculated by dividing the square footage of the open floor area by the total power output of the system. Begin laying the cables. Secure them with aluminum tape and arrange the cables in a meandering pattern, using the calculated spacing. If you're using heat shrink mesh, you can also use plastic quick-release ties to secure the cables. Note: The heating cables must never be interrupted, overlapped, or crossed.
- Connect the thermostat according to the thermostat instructions.
- Test the underfloor heating.
- You can then cover the heating cables with cement and then apply the desired screed. However, check the manufacturer's specifications first to ensure it is suitable for underfloor heating.
Here you'll find everything you need to install electrical cables . You can find the mounting materials here . Always carefully read the manufacturer's installation instructions before installing the cables to avoid errors. Do you have any questions about installing these electric heating cables? Contact one of our specialists, and we'll be happy to help.
Electric underfloor heating cables (dry construction)
Besides electric underfloor heating mats and heating cables for new construction, you can also use electric underfloor heating cables for dry construction. For this, use the HeatBoard E heating cable . This can be applied directly under floating wood, parquet, or laminate floors. We're happy to explain how to install underfloor heating with HeatBoard E cables.
- Here too, it's important to consider the space you're using. Make sure you know which and how many meters of cable you need for the room you want to heat. Also, ensure that the floor area to be heated also has sufficient current capacity (AMPs). Easily order the correct size and number of mats for your area online. A tool is included with the product that calculates how many meters of cable you need for your situation.
- Make sure the surface is flat, clean, dust-free and grease-free. Lay the HeatBoad E system panels . Start laying from a corner and use the included safety gloves. The panels can then be easily fitted together thanks to their puzzle shape, and any excess material can be cut away.
- Determine the location of the thermostat. Cut out the necessary slots and install the flush-mounted box, electrical conduit, and floor sensor.
- Begin by laying the HeatBoard E cables from the thermostat. Press the heating cable into the pre-formed cable guides. This must be fully integrated into the floor and must not be shortened.
- Are the cables integrated into the floor? Then you can apply the included felt layer. Cover the entire system with this. Then lay the desired finishing floor.
- Connect the thermostat. This should be done by a certified installer.
- Please check the manufacturer's specifications first to ensure it is suitable for underfloor heating.
Here you'll find everything you need to install electrical cables . Always carefully read the manufacturer's installation instructions before installing cables to avoid errors. Do you have any questions about installing these electric heating cables? Contact one of our specialists, and we'll be happy to help.
Installing water-based underfloor heating yourself
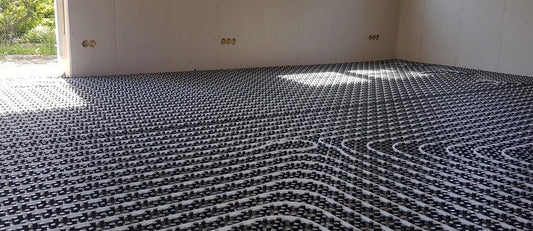
Water-based underfloor heating can be installed in various ways. You can use different mounting systems to secure the heating pipes. The first and last steps of installing water-based underfloor heating are the same. The mounting systems make the difference. The general steps are described below.
- Make sure the room is dry and dust-free and provide a level subfloor.
- Calculate and determine the Pipe spacing. Do you want to use underfloor heating as your primary or secondary heating? Primary heating requires a 100mm spacing between pipes and 10 meters of pipe per m². Additional heating requires a 200mm spacing between pipes and 5 meters of pipe per m².
- Determine the laying pattern. Will you go for a snail shell or a meander?
- Read the instructions for the chosen mounting system (tacker plates, stud plates, dry construction EPS insulation boards, HeatBoard W system panels or SlimFit)
- Determine which distributor You need the distributor and its location. Hang the distributor and connect the pipe to it. Then connect the distributor according to the installation instructions for the selected distributor.
- Once all pipes are connected to the manifold, you can pressurize the system and test for leaks. This can be done in several ways: filling from the central heating circuit, filling with tap water, or pressurizing with air.
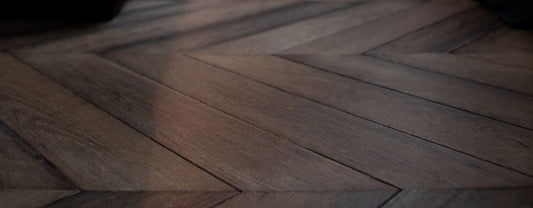
- Lay the screed. With a newly poured screed, the underfloor heating pipe must be completely covered to allow for rapid thermal movement. The screed must also be at least 7 cm thick, including the pipe. This prevents cracking. Underfloor heating systems can be used under any type of floor finish. However, each type has a different level of thermal resistance. For example, tiles, natural stone, and marble have low thermal resistance and allow for rapid thermal movement. Carpet, wood, and laminate, on the other hand, have higher thermal resistance and slow down thermal movement.
- Allow the floor to dry thoroughly. Underfloor heating should only be used at least eight weeks after a new screed has been laid.
Water-based underfloor heating with tacker plates
One of the mounting systems uses tacker plates. An advantage of this is that it's ideal for large surfaces.
- 1. Place edge insulation along the walls
- Lay the tracker plates on the floor, placing them next to each other. The plates can be secured to the floor with tape, mounting adhesive, or glue.
- Lay the pipes. You can attach them to the tracker plate with staples and a staple gun. Use approximately 3 staples per meter of pipe to prevent the pipes from shifting when the screed is disturbed.
To install water-based underfloor heating with tacker plates, you will need the following: pipes , couplings and valves , edge insulation , tacker plates , tacker staples and a tacker-stapler .
Water-based underfloor heating with stud plates
Another installation system is the use of studded panels. These panels are specially designed to simplify the installation of underfloor heating, reducing installation time.
- Place the edge insulation along the walls.
- Place the stud plates over the floor and position them next to each other.
- Attach the stud plates together by sliding the outer plastic studs of the plates over each other. The plates can be secured to the floor with mounting adhesive or glue.
- Then lay the pipes. You can secure them by pressing/clamping them between the studs.
To install water-based underfloor heating with studded panels, you will need the following: pipes , edge insulation , expansion joint and stud plates .
Water-based underfloor heating with dry-build insulation boards
EPS insulation boards are a third type of installation system that can be used to install underfloor heating yourself. These boards are suitable for rooms with low installation heights or where the supporting structure is less strong (e.g., a wooden subfloor).
- Lay the EPS insulation boards over the floor. The boards can be secured to the floor with adhesive or mounting kit.
- Attach the Omega profiles to the insulation plates by pressing them into the slots.
- Then lay the tubes. You can secure them by clicking them between the Omega profiles.
To install water-based underfloor heating with tacker plates, you need the insulation plates: pipes , dry-build insulation boards and the Omega profiles .
Water-based underfloor heating with HeatBoard W system panels
HeatBoard W system panels are a fourth type of mounting system that can be used to install underfloor heating yourself. These system panels can be used directly under a floating wood, parquet, or laminate floor. They are also very suitable for dry areas and ideal for renovations.
- Lay the HeatBoard W system panels over the floor. The panels can be secured to the floor with mounting adhesive or glue.
- Then lay the pipes. You can secure them by clicking the intermediate rails.
- Cover the entire floor with the felt cloth.
To install water-based underfloor heating with HeatBoard W system panels, you will need the following: pipes and HeatBoard W system panels
Water-based underfloor heating with SlimFit
A final installation system you can use to install your own underfloor heating is the SlimFit system. Available in 10 and 12 mm, SlimFit is the lowest of its kind. It's suitable for both underfloor and wall heating.
- Securely attach the SlimFit to the subfloor to prevent it from floating or shifting. This can be done with impact plugs or spigots. The plastic mats simply click together.
- Then lay the pipes.
To install water-based underfloor heating with SlimFit, you will need the following: pipes and the SlimFit system .
After reading this explanation, do you still have questions about installing underfloor heating yourself? Are you unsure which system is best for you? Then please contact us. contact Contact one of our specialists. They'll be happy to help you.